09 947 9409 | Office Hours 9am -5pm Weekdays info@passmasters.nz

What Safety Gear Is Recommended for New Motorcyclists in New Zealand?

If you’re new to riding, sorting gear can feel like a minefield.

In New Zealand, a helmet is legally required — but for real-world safety, we strongly recommend full protective gear every ride.

At Passmasters Rider Training, we also take a clear stance on materials:

Full leather offers the best abrasion protection.
But we also get that budgets are real — so our advice is simple:

Buy the best you can afford, and upgrade smart over time.


Quick Answer

New motorcyclists in NZ should wear:

  1. Approved helmet (legal requirement)

  2. Armoured jacket

  3. Protective gloves

  4. Protective pants

  5. Over-the-ankle boots

We recommend leather wherever practical for slide protection, and CE-rated impact protection in key areas (shoulders, elbows, back, hips, knees).


Helmet First (Don’t Compromise)

A properly fitted full-face helmet is the best option for most new riders.

If you’re spending money anywhere, spend it here first.


Leather vs Textile (Our Take)

Leather

  • Best abrasion resistance in a slide

  • Durable and consistent protection

  • Ideal for road riding

Textile

  • Lighter and often more breathable

  • Better in wet weather

  • More affordable (especially entry-level)

If your goal is maximum crash protection: leather wins.
If budget is tight: good textile with proper armour is still far better than casual clothing.


Understanding Armour “Levels” (This Is Where People Get Confused)

Most motorcycle armour (in jackets and pants) is rated under CE impact standards.

Level 1 vs Level 2 (The Ones You’ll See Most)

Level 1 armour

  • Basic impact protection

  • Often comes standard in entry-level gear

  • Usually thinner / more flexible

  • Better than nothing, good starting point

Level 2 armour

  • Higher impact absorption than Level 1

  • Often a bit thicker (but modern Level 2 can still be slim)

  • Recommended for riders wanting the best protection

In plain English:
Level 2 generally cushions impacts better than Level 1.


So What’s “Level 3”?

You’ll hear “Level 3” talked about online, but it’s not commonly used as an official, universal armour rating for jackets/pants the same way Level 1 and Level 2 are.

When riders say “Level 3”, they usually mean one of these:

  • Upgrading to premium Level 2 armour (better coverage, better materials)

  • Adding additional protection systems, like:

    • Chest protectors

    • Better back protectors

    • Airbag vests/jackets (huge step up for impact protection)

So, if you want the “next level” beyond standard armour, think:
High-quality Level 2 + better coverage + optional airbag.


The Smart Budget Move: Buy Upgradeable Gear Now, Improve Armour Later

This is one of the best ways to save money upfront without compromising long term.

Here’s the strategy we recommend at Passmasters:

Buy a quality jacket and pants you like and will actually wear
✅ Make sure they have:

  • Good abrasion resistance (leather preferred)

  • Proper stitching and construction

  • Armour pockets in the right places
    ✅ Start with whatever armour it comes with (often Level 1)

Then later:

⬆️ Upgrade to Level 2 armour inserts for:

  • Shoulders

  • Elbows

  • Back

  • Hips

  • Knees

Why this works

  • You avoid paying top-dollar upfront

  • You don’t need to replace the whole jacket/pants later

  • Armour upgrades are often a fraction of the cost of new gear

  • You can prioritise upgrades (e.g. back protector first)


Upgrade Priority List (Best Bang for Buck)

If you’re upgrading over time, we’d do it in this order:

  1. Back protector (often sold separately and a big improvement)

  2. Knees + elbows (high-impact areas)

  3. Hips + shoulders

  4. Consider airbag as the premium upgrade path


Gloves, Pants, Boots (Still Non-Negotiable)

Gloves

Look for:

  • Leather palms

  • Knuckle protection

  • Secure wrist closure

Pants

Options:

  • Leather pants (best slide protection)

  • Quality textile pants

  • Riding jeans with proper protection

Boots

Aim for:

  • Over-the-ankle

  • Stiff sole

  • Ankle reinforcement


Bottom Line (Passmasters Advice)

  • Leather is best for abrasion protection

  • Level 2 armour is best for impact protection

  • Start with what you can afford, but choose gear you can upgrade

  • You can save money upfront by upgrading armour later instead of replacing the whole kit


Choosing Gear Based on the Kind of Rider You Are

Not all riders need the same setup.

Before you buy gear, ask yourself:

What kind of rider am I going to be?


🌧 All-Weather Rider

If you’re planning to ride year-round — commuting, training, weekend rides regardless of conditions — your gear strategy should reflect that.

You may want:

  • A dedicated summer set

  • A dedicated winter set

Summer Gear

  • Better airflow / ventilation

  • Lighter construction

  • Still proper abrasion protection

  • Removable liners stored away

Winter Gear

  • Waterproof outer layer

  • Thermal liner

  • Wind protection

  • Less ventilation

If you’re riding in all seasons, having two purpose-built setups is often more comfortable and safer than trying to make one set do everything.


☀ Fair-Weather Rider

If you only ride in good conditions — sunny weekends, occasional training sessions — you can absolutely run one quality set.

In this case, look for:

  • Removable thermal liner

  • Removable waterproof liner (if included)

  • Good ventilation zips

  • Upgradeable armour pockets

Most modern motorcycle gear is modular.

That means:

  • Liners can be removed or replaced

  • Armour can be upgraded

  • Back protectors can be added later

  • Some jackets accept chest protectors

One well-chosen jacket and pants combo can cover a wide range of riding if it’s properly designed.


Modular Gear = Smart Long-Term Investment

This is something we strongly encourage at Passmasters.

Instead of buying “cheap now, replace later,” look for:

✔ Proper abrasion material (leather preferred if possible)
✔ CE armour pockets
✔ Removable liners
✔ Room for armour upgrades

You can start with standard inserts and later upgrade to:

  • Level 2 armour

  • Better back protectors

  • Chest protection

  • Even airbag systems

This approach spreads cost over time without compromising long-term safety.


Practical Buying Strategy for New Riders

If budget is tight, here’s a sensible order:

  1. Good full-face helmet

  2. Proper jacket (upgradeable armour)

  3. Gloves

  4. Boots

  5. Riding pants

  6. Armour upgrades over time

Don’t try to buy everything “top spec” on day one.

Buy solid foundations — then improve the protection as you grow into riding.


Final Passmasters Advice

  • If you ride often and in all weather — consider seasonal gear.

  • If you ride occasionally — choose one modular, upgradeable set.

  • Leather still offers the best abrasion resistance.

  • Level 2 armour offers better impact protection.

  • Most gear today is modular — use that to your advantage.

The best gear is the gear you will actually wear every ride.
What Sets a Great Motorcycle Instructor Apart?

When it comes to learning how to ride well, who teaches you matters just as much as what you’re taught. A great motorcycle instructor doesn’t just help you pass a test — they shape safe habits, sharper skills, and confident decision-making that stays with you for life.

At Passmasters, motorcycle coaching is treated as a craft. One that requires constant learning, humility, and real-world riding experience. That’s why we invest heavily in our instructors, long after they’ve earned their qualifications.


Motorcycle Coaching Is More Than a Certificate

Anyone can complete the minimum requirements to become a motorcycle instructor. Very few continue to train, refine, and challenge themselves year after year.

At Passmasters, ongoing instructor development is non-negotiable.

Our instructors regularly give up personal time to attend internal training days focused on:

  • Advanced riding techniques

  • Teaching methods and communication

  • Risk management and real-world road scenarios

  • How to coach riders at different confidence and experience levels

This ensures every Passmasters motorcycle coaching session is consistent, professional, and up to date with best practice — not just “good enough.”


Learning From the Track, Teaching on the Road

Great motorcycle instructors understand what a bike is capable of — and where riders commonly go wrong.

That’s why Passmasters actively encourages instructors to attend track days as part of their development. The controlled environment of the track allows instructors to:

  • Refine braking, cornering, and throttle control

  • Understand grip, traction limits, and body positioning

  • Experience high-pressure riding scenarios safely

Many of our instructors bring additional experience from motorcycle racing, with several having won races across different classes. Others have trained internationally through the California Superbike School, one of the world’s most respected motorcycle training programs.

This depth of experience feeds directly into smarter, safer motorcycle coaching on New Zealand roads.


Carefully Selected. Continually Trained.

Not everyone becomes a Passmasters motorcycle instructor.

We select trainers based on:

  • Riding skill and judgement

  • Ability to communicate clearly and calmly

  • Commitment to ongoing learning

  • A genuine passion for helping riders improve

Once selected, that’s only the beginning. Continuous training ensures Passmasters instructors don’t rely on outdated habits or shortcuts — they stay current, sharp, and accountable.


Why This Matters for Riders

Choosing the right motorcycle instructor can be the difference between:

  • Riding defensively vs riding confidently

  • Memorising test routes vs building lifelong skills

  • Passing once vs riding well forever

Passmasters motorcycle coaching is designed to give riders more than a licence. It’s about awareness, control, and confidence — taught by instructors who are constantly working to be better riders themselves.


Motorcycle Coaching You Can Trust

If you’re looking for motorcycle coaching backed by real experience, ongoing instructor training, and a culture that values skill over shortcuts, Passmasters sets the standard.

Because the best riders never stop learning — and neither do the best motorcycle instructors.

Mastering Wet Weather Riding: How to Stay Safe and Confident in the Rain

Riding in the rain doesn’t have to be scary — in fact, some of the most experienced riders in New Zealand commute year-round and thrive in all conditions. With the right skills, gear, and bike prep, you can confidently ride wet roads without losing control or visibility.

This guide is designed to help you understand how to prepare, how to ride, and what to watch for when the weather turns.


🧠 Riding Skills for Wet Weather


🛣️ Lane Positioning

In wet conditions, avoid shiny road markings, manhole covers, or puddles that could hide potholes. Use your lane to maintain grip and visibility.

  • Stick to the car tyre tracks in your lane — they’re usually drier and offer better grip.

  • Avoid the centre of the lane at intersections — that’s where oil and fuel drip from vehicles.

⏳ 4-Second Rule

In the wet, double your following distance. This gives you extra time to stop and react to traffic.

  • Use the 4-second rule instead of the usual 2 seconds.

  • Count the seconds between when a vehicle passes a landmark and when you do.

👀 Scanning Techniques

Rain reduces visibility — so your scanning becomes even more important.

  • Keep your eyes up and scanning 10–15 seconds ahead.

  • Check your mirrors more often — cars may brake harder or change lanes unpredictably.

  • Watch for rainbows on the road — those indicate slippery fuel patches.


🧥 Gear Up: Staying Dry, Warm & Fog-Free

 Visor Tech

  • Pinlock inserts prevent fogging — an essential upgrade for any learner helmet.

  • Armour Vision Smartfilm or Rain-X can be applied to visors for water beading.

  • Keep a soft microfibre cloth or visor wipe in your jacket pocket for quick cleaning.

🧤 Gloves & Grips

  • Use waterproof gloves or heated gloves to avoid numb fingers.

  • Install heated grips to stay warm and maintain throttle control.

  • Hand guards help deflect wind and rain away from your hands.

🧣 Wet Weather Riding Gear

  • A quality 2-piece wet weather over-suit is essential for longer rides.

  • Always ride with a zip-up textile jacket and long pants (even in summer).

  • Use high-vis wet weather covers to stay seen and dry.

Pro Tip: Pack a spare set of dry gloves or socks in your backpack for the ride home.


🛠️ Bike Maintenance Matters More in the Wet

🛞 Tyres

  • Your tyres are your only contact with the road — don’t compromise here.

  • Check tread depth and replace tyres if worn or squared off.

  • Ensure your tyres are correctly inflated — under-inflated tyres increase stopping distance in the wet.

🛑 Brakes

  • Make sure both front and rear brakes are responsive and not worn.

  • Wet brakes may take longer to engage — test gently at the start of each ride.

💡 Lights & Visibility

  • Always ride with your headlight on.

  • Make sure your brake light, indicators, and number plate light are clean and functional.

  • Consider installing LED auxiliary lights for better visibility in fog or rain.


🧭 Bonus Tips for Rain Riding

  • Avoid sudden throttle, brake, or steering inputs — smooth is safe.

  • Ride a gear higher than usual to avoid wheelspin in lower gears.

  • Brake earlier and more gently than in dry conditions.

  • Use engine braking where possible to reduce risk of skids.


🏁 Conclusion: Control the Rain, Don’t Let it Control You

Wet weather riding can be rewarding and build incredible skill and confidence. At Passmasters, we encourage our learners to ride in all safe conditions — not just the sunny ones. With the right habits, good gear, and a well-prepped bike, you’ll be safer, calmer, and more in control when the rain starts falling.


If you’d like help choosing wet weather gear or want to learn braking techniques in the wet, talk to your Passmasters instructor — we ride year-round and are happy to share what works.

Motorcycle Safety 101: How to Stay Seen, Stay Smart & Stay Safe on NZ Roads

Motorcycling is one of the most thrilling ways to get around — but it also comes with risk. That’s why it’s essential, especially for learner riders, to build a strong foundation of safety awareness. This blog covers everything from spotting hazards early to making yourself highly visible, plus the tech and gear that can help you ride safer every day.


👀 1. How to Spot Hazards Before They Spot You

Most motorcycle crashes are caused by other road users not seeing you — or by road conditions catching you off guard. That’s why hazard detection is one of the first skills we teach at Passmasters.

Common Hazards:

  • Cars turning across your path (especially at intersections)

  • Vehicles pulling out of driveways or side streets

  • Oil, gravel, or debris in corners

  • Wet paint lines, metal manholes, and road markings

  • Parked cars with people inside (watch for opening doors)

How to React:

Scan ahead, not just directly in front of you
Use the “2 & 4 second rule” – scan 2 seconds ahead for immediate hazards, and 4 seconds ahead for developing dangers
Adjust your speed in complex environments – slow down near intersections, schools, or urban driveways
Use lane positioning to improve your line of sight and create space from other vehicles

“Ride like everyone else is about to make a mistake — and give yourself enough space to avoid it.”


🦺 2. How to Be Seen: Visibility is Vital

Being “invisible” to other drivers is a leading cause of crashes — especially during dawn, dusk, or bad weather. The solution? Make yourself unmissable.

High-Visibility Riding Tips:

  • Wear hi-vis vests or brightly coloured jackets

  • Look for gear with reflective panels (great for night visibility)

  • Position yourself in mirrors – don’t ride in blind spots

Smart Visibility Gear:

  • Helmet colours – white, neon, or bright tones stand out more

  • Reflective tape – add it to your helmet, top box, or jacket

  • Backpack covers – high-vis waterproof options make a difference

Subtle black-on-black might look cool, but bright gear can save your life.


🧰 3. Tech That’s Saving Lives

Motorcycle tech has come a long way — and some gadgets can now detect crashes, record evidence, or help you call for help in seconds.

Rider Tech:

  • Helmet cameras (Navman) – record rides and provide evidence in case of accidents

  • Hardwired dash cams – continuously record front and rear views

  • Cardo Packtalk Edge with crash detection & auto-alert – alerts emergency contacts if you go down

  • Phone apps – like “Realrider” or “Crashlight” that use crash detection tech and GPS alerts

Bike Safety Features:

  • ABS (Anti-lock Braking System) – helps you brake hard without skidding

  • Traction control – reduces wheelspin in poor grip conditions

  • Lane assist / blind spot alerts – increasingly found on modern bikes

  • LED lighting – brighter, sharper and easier to see than halogen bulbs

Even if your bike doesn’t come with this tech, you can retrofit cameras and use smart helmets or Bluetooth systems to increase your safety margin.


🧠 4. Safety Isn’t a Feature — It’s a Habit

The most important part of motorcycle safety isn’t something you can bolt on — it’s your mindset. Staying alert, riding within your limits, and continually improving your skills will do more for your survival than any gadget.

Quick Habits to Build:

  • Always ride with your full protective gear – even on short trips

  • Scan constantly – never “zone out”

  • Stay predictable – no weaving or sudden moves

  • Take a refresher course every 6–12 months to keep your edge sharp


🏁 Final Word: Confidence Comes from Preparedness

As a learner rider, you’re building habits that could save your life one day. Invest in good gear. Make visibility a priority. Understand your surroundings. And take advantage of the incredible safety tech available to modern riders.

Have questions about safety gear or tech? Ask your Passmasters instructor — we ride every day and test this stuff in real life.

What to Expect at Your First Motorcycle Lesson (BHST)

Starting your motorcycle journey can be equal parts exciting and nerve-wracking — especially when you don’t know what to expect. At Passmasters, we’re all about making that first step as welcoming and confidence-building as possible. This guide will walk you through what your first lesson is really like and help you feel more prepared (and less anxious) when it’s time to ride.


🧠 What is the BHST?

The Basic Handling Skills Test (BHST) is the first practical step toward getting your motorcycle licence in New Zealand. It’s designed to assess your ability to safely control a motorcycle in a controlled, off-road environment. Most new riders complete it in a single session that includes both training and testing.


📅 Before You Arrive

Here’s how to set yourself up for success:

  • What to bring:
    • Your driver licence (NZ or international, if applicable)
    • Long pants (must be fully covering) and a zip-up jacket
    • Sturdy, closed footwear (boots preferred)
    • Water and a positive mindset!
  • Don’t have gear? We can supply helmets and gloves. You’ll need to bring your own jacket, pants, and footwear that meet safety requirements.

🕘 How the Session Runs

Expect the full BHST session to run for about 2–3 hours, depending on group size and how many people are testing that day.

1. Welcome & Briefing

We’ll start with a friendly intro and safety briefing. Your instructor will explain the layout, go over the gear, and check you’re set up correctly on the bike.

2. Warm-up & Familiarisation

Before any testing happens, you’ll get time to warm up. This is where we show you how to use the clutch, throttle, brakes, and gears — all at a learner pace.

3. Training Through the Test Exercises

We guide you through each of the test exercises in a supportive, step-by-step way. These include:

  • Straight-line riding
  • Cornering
  • Braking and stopping under control
  • Figure 8 turns
  • Slow-speed riding

You’ll have time to practice before the actual test begins.

4. The Test

When you’re ready, we run you through the test exactly as required by NZTA. It’s not a trick — we’re here to help you pass, not fail you.

5. Feedback & Next Steps

After the test, your instructor will go over your results. If you pass, you’ll receive a BHST certificate that you can take to VTNZ or AA to book your learner licence theory test.

If you need more practice, that’s okay too — we’ll explain what to work on and help you book another session if needed.


😅 Nervous? You’re Not Alone

Most new riders are nervous before their first lesson. That’s totally normal. Our instructors are patient, supportive, and used to working with complete beginners. We’ll never rush you or make you feel out of place.

“I’d never ridden before, and I was shaking with nerves — but the instructor was calm and encouraging, and now I’m hooked on riding.” — First-time rider, Hamilton


🏁 What Happens Next?

Once you pass the BHST, you’re ready to:

  • Book and pass the Learner Licence Theory Test
  • Hit the road under the learner conditions
  • Join a Ride Forever Bronze Course to grow your skills further

✅ Quick Checklist for Your First Motorcycle Lesson

Item Bring Your Own We Can Provide
Helmet
Gloves
Zip-up Jacket
Fully Covered Pants
Boots
Licence ID
A great attitude ❤️

💬 Have Questions?

Check out our FAQs page or contact us — we’re always happy to chat.

Ready to get started? Book your BHST session now and take the first step toward two-wheeled freedom!

Affordable Motorcycle Gear for Learner Riders in New Zealand

When you’re starting out, buying the right gear can be confusing – but it doesn’t need to break the bank. At Passmasters, we’ve helped hundreds of new riders get started, and we’ve hand-picked this kit to give you the best value in comfort, protection, and price.

All the gear below is fully road legal, suitable for training and learner licence conditions, and gives you confidence when you’re out on the road.


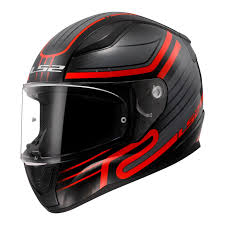
🪖 Helmet: LS2 FF353 Rapid ($159)

  • Type: Full Face
  • Why We Recommend It: Lightweight, ECE 22.05 certified, great ventilation and stylish designs.
  • Perfect For: Learners who want solid protection without paying premium prices.

“A great all-rounder helmet that meets NZ safety standards and keeps you comfortable during longer rides.”


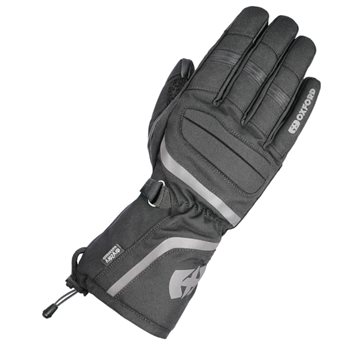
🧤 Gloves: Oxford Convoy Glove ($79)

  • Type: Short cuff textile glove
  • Why We Recommend It: Waterproof, windproof, warm – ideal for NZ conditions.
  • Perfect For: Winter learners or those commuting in cooler weather.

“You’ll keep your fingers protected and dry, while still being able to feel the bike controls properly.”


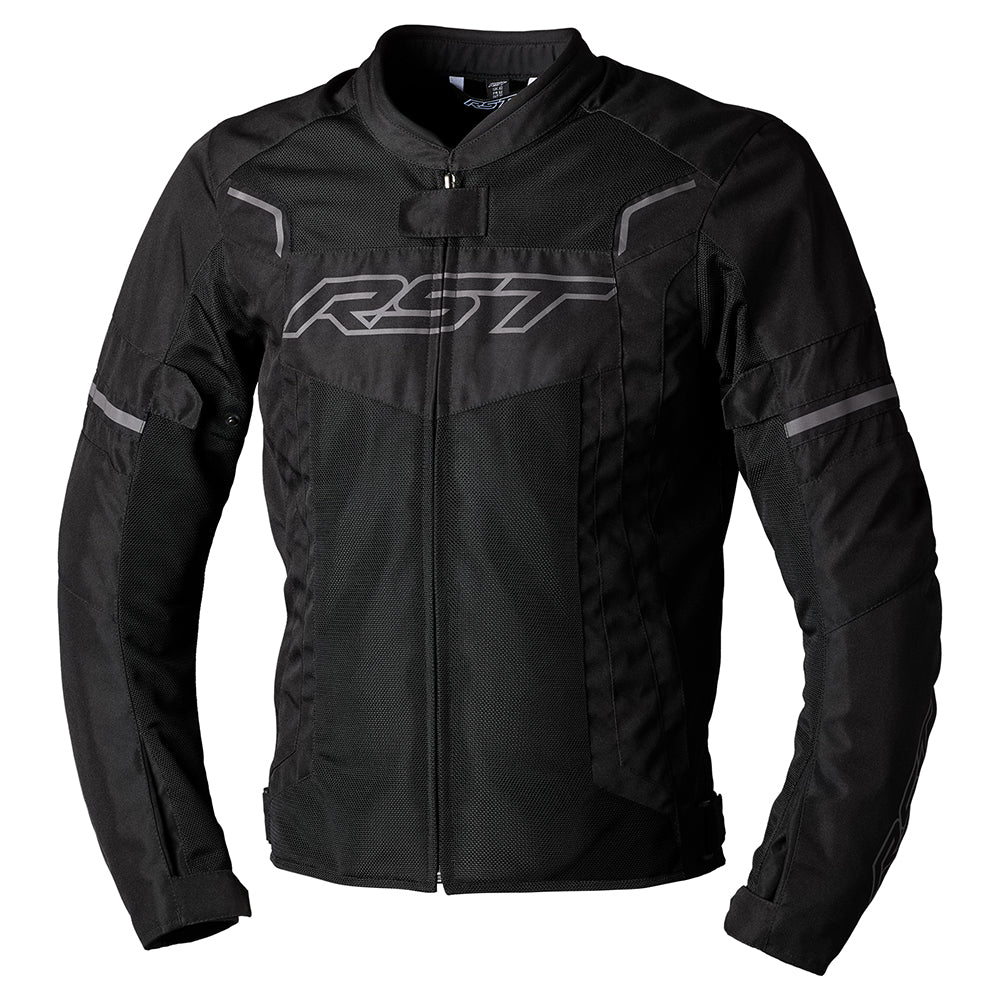
🧥 Jacket: RST Pilot Evo Jacket ($249)

  • Type: Textile, armoured
  • Why We Recommend It: CE armour in elbows/shoulders, waterproof liner, multiple adjustment points.
  • Perfect For: All-year-round NZ riding – offers both airflow and protection.

“This is a jacket we often wear ourselves – it’s breathable, protective, and sharp-looking.”


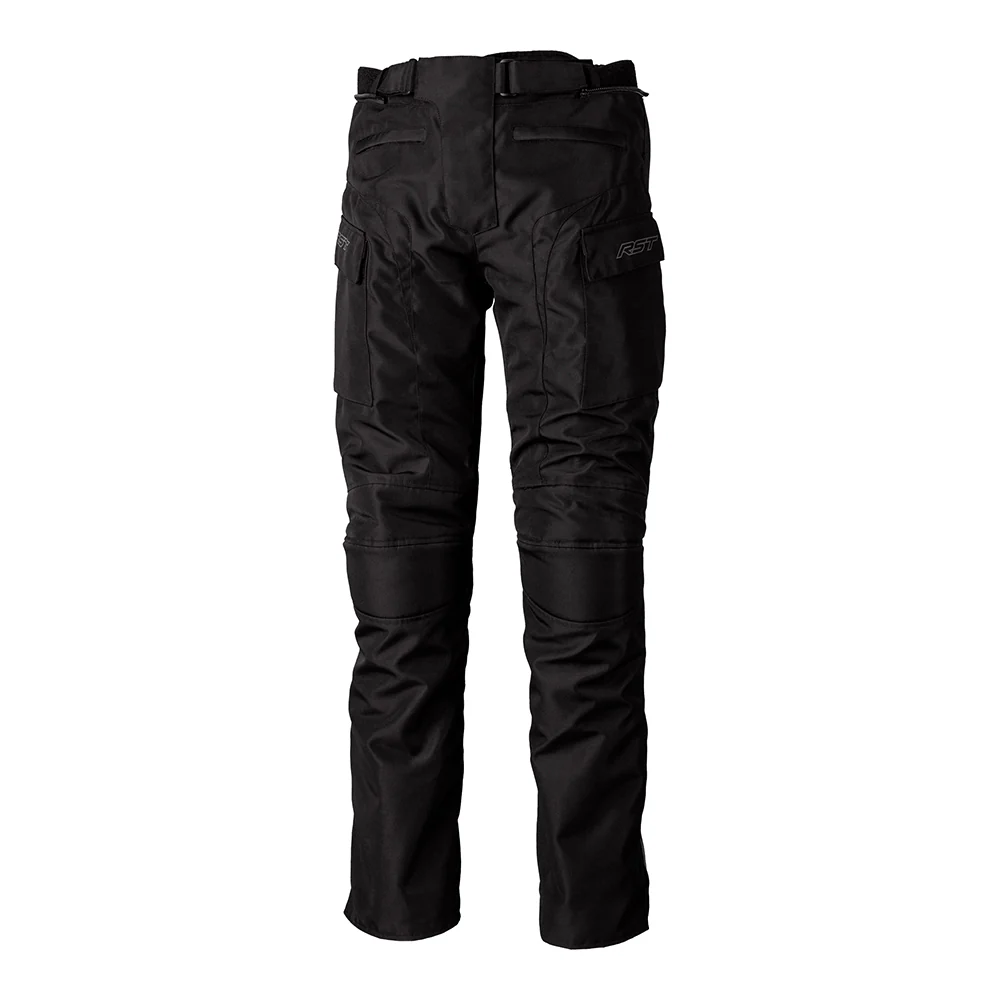
👖 Pants: RST Alpha 5 Pant ($239)

  • Type: Textile touring pants
  • Why We Recommend It: CE knee armour, thermal liner, reflective detailing.
  • Perfect For: New riders commuting or learning in mixed weather.

“A comfortable, no-nonsense pair of riding pants that can take you from learner to restricted with ease.”


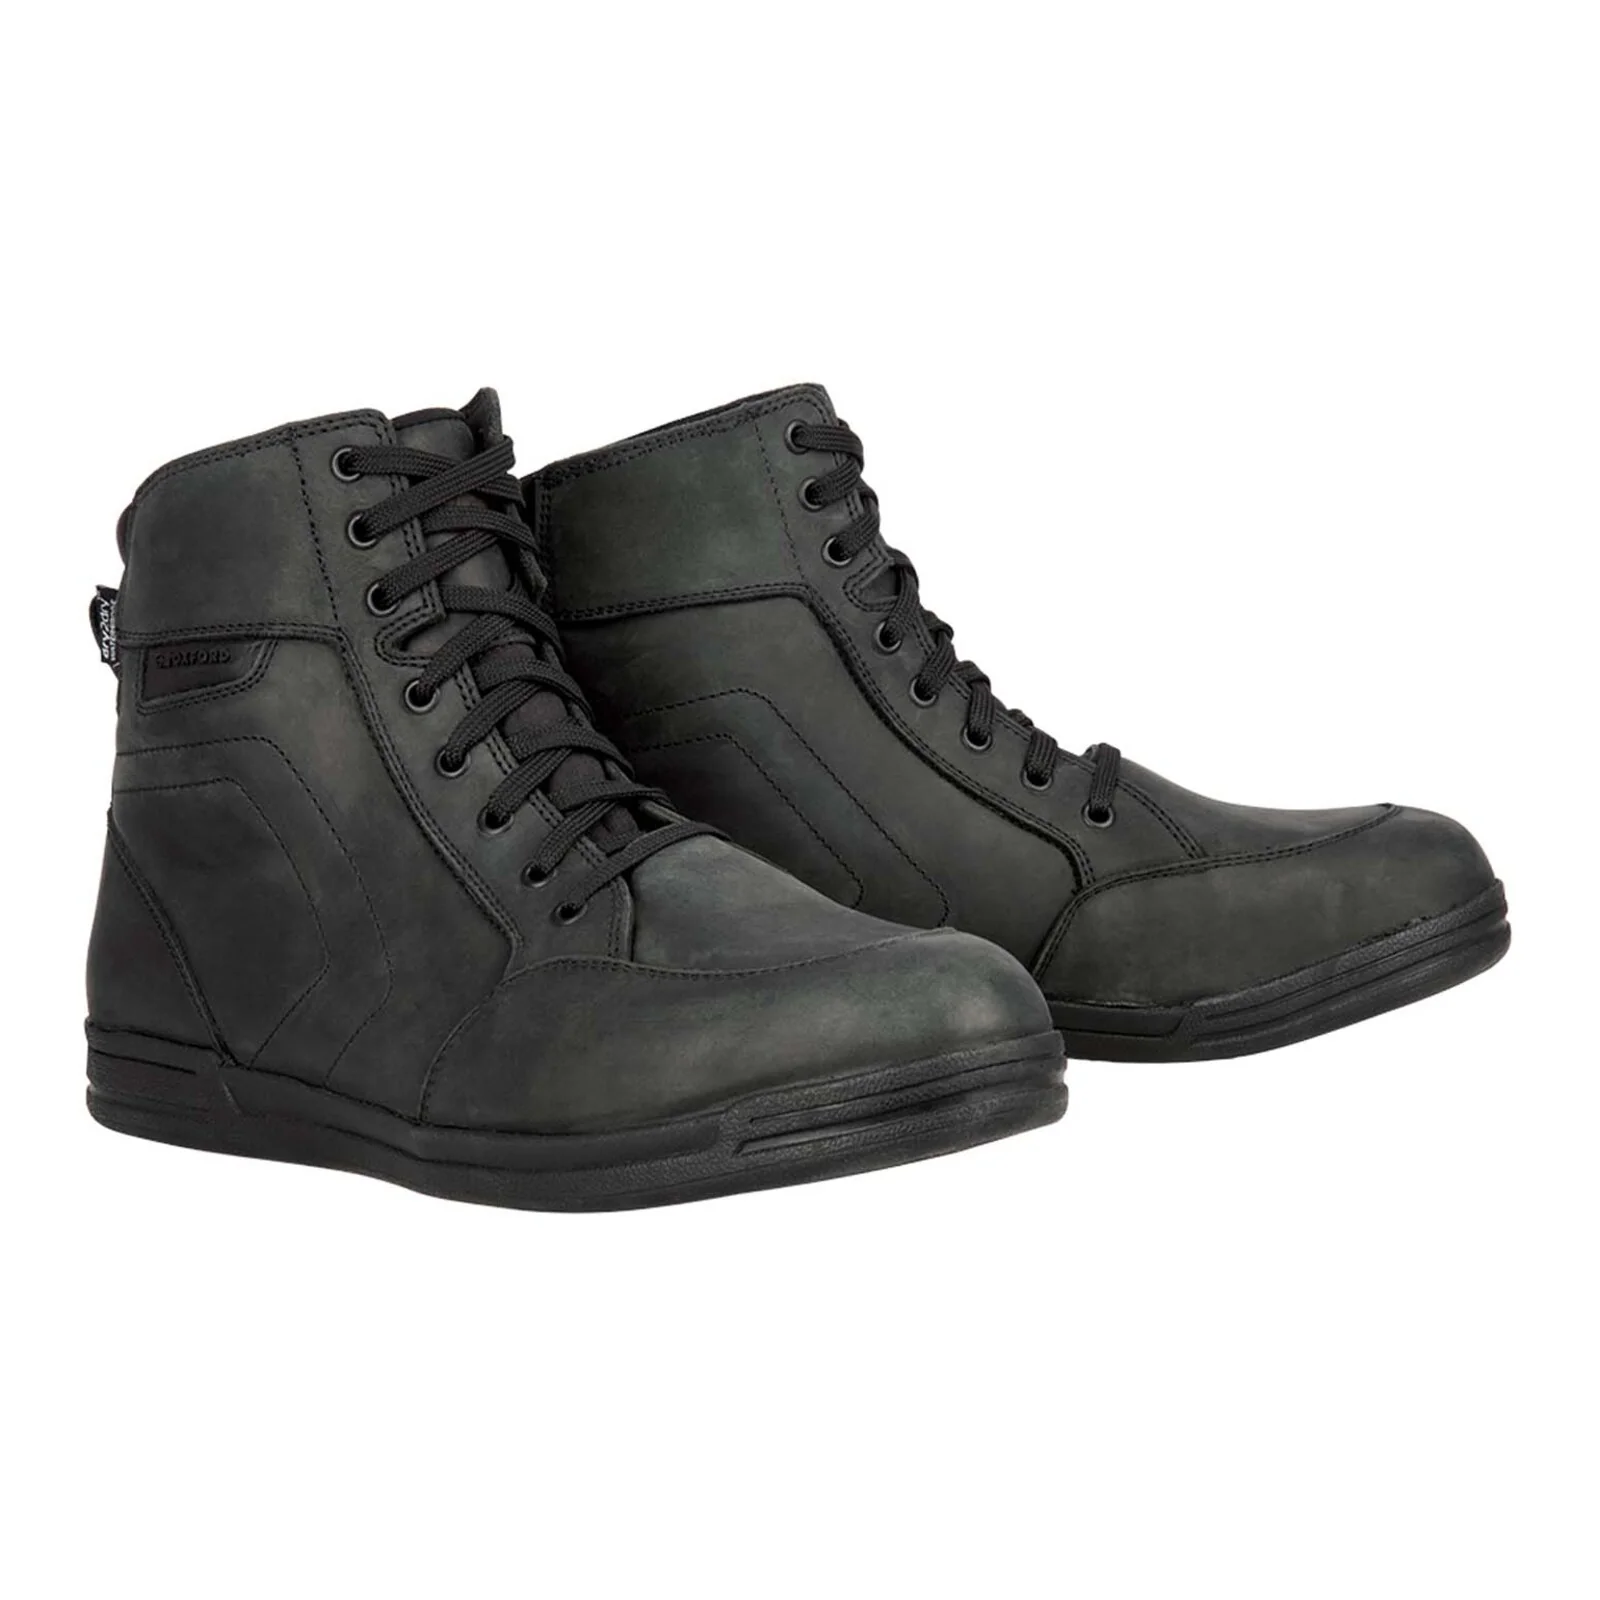
👢 Boots: Oxford Kickback Boot ($229)

  • Type: Casual-style protective boot
  • Why We Recommend It: Looks like a sneaker, protects like a boot – reinforced heel, toe, ankle.
  • Perfect For: Learners who want gear that doesn’t scream ‘power ranger’.

“These boots blend in off the bike, but give you legit protection on the road.”


🛒 Where to Buy

Most of this gear is available through local NZ motorcycle stores like Motomail, Cyclerama, or Bike Rider Gear NZ. Always try gear on if possible – fit and comfort are just as important as price.


✅ Summary: Gear Checklist for Beginners

Gear Type Product Name Price (NZD)
Helmet LS2 FF353 Rapid $159
Gloves Oxford Convoy $79
Jacket RST Pilot Evo $249
Pants RST Alpha 5 $239
Boots Oxford Kickback $229
Total $955

💡 Passmasters Tip:

Invest in all the gear, all the time – it’s not just about passing your licence, it’s about building safe habits from day one. Good gear gives you confidence, visibility, protection, and peace of mind.


Want help finding gear that fits you? Chat to your instructor at your next Passmasters session – we’re happy to share advice and even let you try out some common styles.

Stay tuned for more beginner guides on licences, training, first-time bike buying, and more!